I was thinking the other day about what EMC test equipment (what I call ‘gear’) I would like to have on hand if I was an electronic product manufacturer. Then I got to thinking how I could use that test equipment to save on 3rd party EMC testing costs. In this article I’ll go into some details of what I’d do if my main job was designing and manufacturing electronic products, what test equipment I’d buy and how I’d avoid some of the 3rd party test requirements.
What You’re Going to Learn in this Article
- The top 5 ways to save tens of thousands of dollars on 3rd party testing costs
- The EMC test equipment I would buy if I were you
- What EMC test equipment I own and use
- How to make the return on investment justification (aka how to keep the boss happy)
Top 5 Ways to Save on 3rd Party Lab EMC Testing Costs
1. Buy Immunity EMC Test Equipment
Buying immunity EMC test equipment isn’t just useful for pre-compliance testing and troubleshooting. Often there’s no reason at all why you couldn’t do full compliance EMC testing at your own office. If you ship your products to Europe, or if your industry specific standards call out immunity tests (e.g. Automotive, military, aerospace, medical, railway etc..) or if you’re using international product standards, then more than likely you’re going to need to do immunity testing for every product. Some of these applications mandate a particular designation, accreditation or authority of test lab, but many do not. In those cases, there’s no reason that you can’t do it yourself.
There are lots of small to medium manufacturers that have their own in house EMC test facilities – sometimes they can just do EMC pre-compliance testing, sometimes they can do part of the full compliance testing themselves and sometimes they can do everything themselves.
When can you do your own in-house full EMC compliance testing?
For geographical regions where EMC immunity testing is mandatory (e.g. Europe, Australia, New Zealand and others…) there is a common misconception that you need to use an accredited or ‘approved’ 3rd party test lab to do the testing for you. I often heard people use the phrase ‘CE certification’, hinting that a test lab has a special designation that can ‘certify’ your device for Europe. That’s not the case at all. The “CE Mark” is a self declaration by a manufacturer that their product meets the requirements of the relevant CE Mark directives (e.g. EMC directive, LVD (Safety) directive, machinery directive, medical directive, radio equipment directive etc..). You generally prove that your product meets these directives by outsourcing the testing to a 3rd party lab and holding the test reports on hand to prove that you’ve done your due diligence.
Most 3rd party testing labs don’t have any more authority than your company does (for CE testing). There is no central governing authority in Europe that test labs register with (unless they are ‘notified bodies‘ or involved with some industry specific test such as medical) so they have no more power to ‘certify’ your device than you do!
As with most things in EMC and wireless testing though, there are always exceptions to the rule. Lab ‘accreditation’ is often required for certain types of testing such as for certain types of (but not all) wireless transmitters. Product categorizations and test requirements are also always in a state of flux, so it’s tricky to keep track of what is actually required for each geographic region or industry specific standards.
In North America, it used to be the case that you could have your own in-house non-accredited wireless test lab and certify your own wireless devices, but as I outlined in an article, the rules have just changed and your right to do this is currently being removed. Within a year or two, you’ll need to have an accredited lab for your wireless measurements to be acceptable to the FCC.
So in what cases could you do your own full compliance EMC immunity testing at your own un-accredited office lab? Here are a few that come to mind:
- CE mark testing (with a few caveats for industry specific requirements),
- Australia and NZ (with a few caveats of course),
- Many international (IEC) product standards,
- Many industry specific standards where your end customer does not demand test reports from an accredited lab.
You could of course put your own lab through the ISO17025 accreditation process which would remove many of the barriers to doing the EMC testing yourself that I mentioned above. But the price tag and man-power required for that is often prohibitive. If I was a manufacturer I would be much more inclined to have a non-accredited in house lab if at all possible.
I can’t cover every eventuality of whether you could legally do EMC testing for your particular product in your particular industry and in the individual regions that you’re selling into (because my head would explode), but I’ve given you a few ideas above. I would just say that it’s worth your while to think carefully about what authority your test lab holds to perform every test you need and think about whether you could copy that authority.
My EMC test lab for instance, where I was doing 3rd party testing for many manufacturers across many industries and regions was not accredited and the only designation it had was registration with the FCC and Industry Canada. I still had the test equipment and authority to do testing for many CE mark test schedules as well as wireless certifications for North America and the wireless testing for Europe and Australia (and more). It would be pretty easy for you to copy the same setup.
Related Resources:
What gear (EMC test equipment) would I buy?
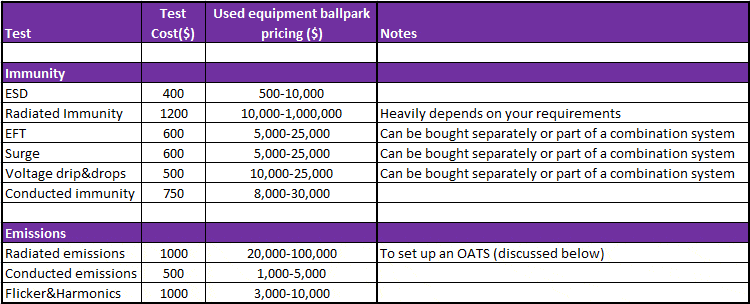
If I was deciding what EMC test equipment to buy, I’d look for the lowest cost equipment that could save me the most on 3rd party testing costs. To work that out, I guess you need to know how much each test is going to cost at a test lab. That way I could do some of the tests in house and outsource the tests I couldn’t do to a 3rd party lab. Let’s take a totally crude breakdown of a sample quote that is similar to what I would have quoted at my test lab. This is for an unintentional emitting device that needs to go through several immunity tests. Let’s say it’s a CE mark test schedule, but it could equally be for an international (IEC) product standard. The ‘used equipment ballpark pricing’ column includes estimates of how much it would cost you to create this test setup in your own office.
This table outlines how much you stand to save if you purchase test gear and if you are legally allowed to do full compliance testing for your product. The pricing will vary a lot from lab to lab and from product to product, but you could ask your own test lab for a full breakdown of the pricing on a per test basis so that you can create this table for yourself.
So based on my purchasing criteria of getting the best ROI (return on investment), you can see that two of the best investments are in ESD and flicker/harmonics testing. These used equipment pricing numbers can vary a lot – they are just representative of my research over the past 5 years. You can do a lot better if you follow my tactics for purchasing equipment – I just picked up an ESD simulator off Ebay for $100 for instance. It works very well, but I needed to 3D print a new plastic discharge head and make a small circuit board for the discharge network (just a resistor and a capacitor). For less than $500 I just saved myself ever having to pay a 3rd party test lab to do an ESD test (ROI = 1 product). ESD is also a test that very often causes a failure at a test lab, so you need to factor in the reduction of risk of a failure at a test lab as well into your ROI calculation.
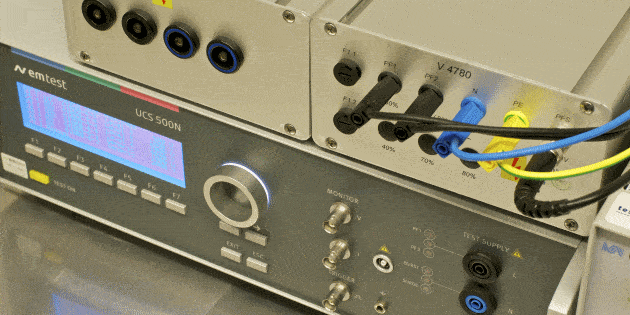
If I had a spare $15k-$20k lying around, I would invest in an immunity test system. This would cover EFT, surge, dips, interruption, magnetic field and more. For $15k I could save approximately $1500-$2000 per product test schedule and de-risk project timelines.
Radiated immunity is also an area where you stand to save a fortune per product because it is a very time consuming test. In many cases you can get away with a GTEM cell or a shielded chamber to do the testing, which helps you to avoid the cost of purchasing a full semi-anechoic chamber. GTEMs also require much lower cost amplifiers to create a given field strength (compared to a semi-anechoic chamber). They are controversial gadgets to use however, but it’s very worthwhile investigating their legality for your test standard.
EMC Test Equipment Calibration
Of course you want your test equipment to be fully functional and operating within specifications. For some standards there is a mandatory calibration frequency (once every 1-3 years) and sometimes it’s mandatory for equipment to be calibrated at an accredited lab (or NIST tracable). But often times ‘verification’ is adequate. If you have an in-cal oscilloscope for instance, then for many standards it’s totally acceptable for you to calibrate your own equipment off that oscilloscope. I got a tour of CSA’s test facilities a few years ago and it blew me away when the tour guide guy told me that their internal calibration lab that they use to do all of their calibrations was not accredited. I can’t vouch for the accuracy of that, but I did question him twice about it because it seemed ridiculous that a test lab as huge as that was not using an accredited calibration facility. Anyway, it’s probable that you can do a lot of your own calibrations as long as you keep good records. Check the requirements of your standards (and end customers requirements) for your particular scenario.
2. Use Pre-Certified RF Modules (if your sales volume is relatively low)
So many products these days incorporate a wireless transmitter. Apparently it’s essential that we’re sent a text message when the trash can is 80% full or the cat has nearly run out of food. I’m not sure how I could live for another day without getting those messages. Anyway, the endless demands of cats means that the number of products with wireless transmitters is growing very fast.
In a past article on RF modules, I outlined some of the trade-offs with choosing a pre-certified wireless module vs. certifying your own transmitter. Texas instruments came out with a really good app note on the subject which put the positive ROI within 2 years of approximately 10,000 units per year. I.e. if you sell more than 10k units per year then certify your own transmitter. If you’re projecting less than that, then you probably won’t make your money back within 2 years. Of course, these numbers will vary wildly with the price of wireless modules fluctuating so much, and the app note was written in 2006, but it’s definitely worthwhile to evaluate this calculation for your product and the chipsets/modules that you are considering.
Personally I would design in a pre-certified wireless module and ship product fast. I’d include space below the module for populating my own transmitter so as soon as I knew I had enough orders and sales I could do the certification procedure myself. I would essentially de-risk the certification procedure by using pre-certified modules first, then upgrade to a full certification later. You could also certify your own module so that you can use it in lots of products and avoid the future certification costs.
Gotchas to watch out for:
- If you’re using pre-certified wireless modules, make sure that they’re certified for every region that you want to enter. E.g. if you’re going to sell into the US and Europe, make sure it is FCC certified and tested to the right CE EMC, safety and RF standards. Otherwise you’ll need to do it.
- I’ve noticed with the increase in essential IOT (internet of things) cat food monitoring transmitters, manufacturers are often packing in several different pre-certified modules into their product. When you do that, you’re entering risky territory for a thing called “antenna co-location”. Basically, if your antennas for each transmitter are separated by less than 20cm and they will be operating simultaneously then you can void the existing certifications. You may need to talk to the original manufacturers and ask them to do ‘permissive changes’ to their certification (which they’re unlikely to do for your low sales volume cat food monitoring transmitter) in which case you’ll probably be left to do the full certification yourself. I recently talked with a company that are using 7 pre-certified modules in one small product, with antennas all within 20cm. I’d be surprised if their RF certification bill was less than $100,000.
3. Set up an in house OATS for unintentional emitter testing
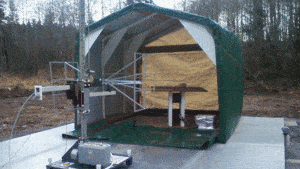 This is one to really consider if you’re producing a few products a year. By registering your site with the FCC and Industry Canada (which isn’t actually that hard), you could potentially do the testing for many unintentional radiators under the ‘verification’ authorization procedure as well as the emissions testing for Europe. I would estimate the lower end cost of setting up an OATS at $20,000 assuming you had the space available and didn’t need to install buildings or electrical service. Lots of companies even install one on their flat roof. With an average emissions test including reports costing approx $1,500, not including pre-compliance testing and failures, you could get a return on your investment within 10-15 products. And that isn’t including pre-compliance testing benefits.
You can presently also register a non-accredited in-house lab with the FCC and Industry Canada to do RF (wireless) certifications, but they are revoking that soon, so it wouldn’t be a great investment.
An OATS would need to be compliant with ANSI C63.4 for North America and CISPR16 for Europe. Just a bit too much information to cover in a blog post to describe how to do that.
4. Do EMC Pre-Compliance Testing
Since approximately 50% of products fail EMC testing first time, any investment you can make in EMC pre-compliance test equipment will help to reduce the risk of that happening to you. In terms of failure risk vs. cost of equipment, I would sway towards this purchase list:
- ESD simulator
- Spectrum analyzer
- Broadband (30MHz to 2GHz) bi-log antenna
- LISN for conducted emissions measurements
- Harmonics & flicker analyzer (if my equipment was relatively high current)
These pieces of equipment can be really good at getting you very close to the results of a 3rd party test lab. So close that you can tell whether you’re going to pass or fail at the lab with a very high degree of confidence. For other immunity tests, it can get really expensive to get close to the results you’ll see at 3rd party lab. The items above can all give you ‘absolute’ measurements. Many other emissions and immunity pre-compliance setups just give you ‘relative’ measurements so they’re no good at telling you whether you’re going to pass or fail at a lab i.e. they’re mainly just good for troubleshooting.
5. Do RF Pre-Compliance Testing
If I was designing a transmitter into my product, I would definitely do RF pre-compliance testing. Unlike emissions and immunity tests where it can be reasonably hard and expensive to get a test setup that is close to a full compliance lab, RF pre-compliance testing is a different story. For many common low power transmitters like Bluetooth, Zigbee and Wi-Fi, a 3rd party test lab does most of the RF testing ‘conducted’ i.e. they just take the output of your transmitter and plug it directly into a spectrum analyzer. There’s no reason that you can’t do exactly the same thing and use an inexpensive ($1k-5k) spectrum analyzer to do a lot of the tests that a lab will do. An RF certification rarely costs less than $10k and can easily exceed $20k. Why would you not pay $1k-$5k for a spectrum analyzer that you could use to work out whether you’re going to pass the majority of the RF tests at a lab?
A 3rd party lab will usually also need to do some radiated RF testing on an OATS or in a chamber which can get really expensive in terms of antennas and extra equipment required so I wouldn’t re-create this part of the testing. But conducted testing will get you 90% of the way there because you can just look at the conducted measurements and factor in the gain of your antenna.
Tools of the Trade – My Evil EMC Test Lab Equipment
Below I’ve listed some of the toys in my toolkit. I sometimes use them for pre-compliance testing and sometimes for EMC troubleshooting. This just gives you an idea of what I’m using and there are a lot of very similar equivalents you could get from different manufacturers. These just happen to be the models that I purchased over the last few years.
EMI Pre-Compliance/Troubleshooting Equipment
Spectrum Analyzers
These are the backbone of every decent in-house lab. Here are the analyzers that I use:
- HP 8560A
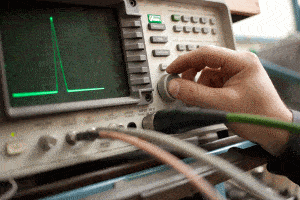
I picked up this unit because it was in mint condition and it was super cheap (from a government surplus site). It works great as a portable analyzer and I use it with my EM Scan near field scanner to get a really accurate idea of emission sources on circuit boards during troubleshooting.
- Rohde & Schwarz FSH3
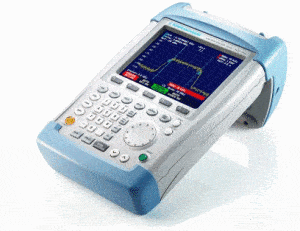
This is great for taking out on the road and doing EMC troubleshooting or in-situ emissions measurements. It’s great for troubleshooting jobs when coupled with a good near field probe set. It’s also useful for RF (wireless) pre-compliance testing.
- HP 8566B with pre-selector and QP addons (an oldie but a goodie)
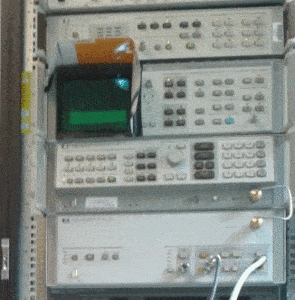
This thing is like the classic workhorse of EMC test labs. Pretty old in the tooth now, but it’s still great for many applications. I use it for some RF pre-compliance stuff because it goes up to 22 GHz, so I can see the higher frequency harmonics, but I’ll probably replace it with a newer model as soon as I can justify the expense.
Other Emissions EMC Testing Equipment
- EM Scan near field scanner
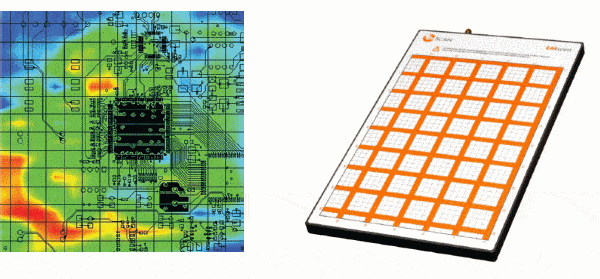
I’ve wanted one of these things for years. I kept my ear to the ground and finally found a used one this year that was within my price range. New they’ll cost over $15k, but in terms of usefulness and coolness factor, it’s hard to beat. It’s basically a bed of near field magnetic probes. It’s coupled to a spectrum analyzer and lets you scan a frequency range so that you can see a realtime readout of the emission frequencies just like at an EMC test lab. It’s very good for tracking down emission sources on a PCB to as you can see from the electromagnetic ‘heat’ map above.
The newer versions come with software that extrapolates the near field magnetic fields to the far field electric fields seen on an OATS. I’m not sure how accurate that is, but it’s certainly very useful for troubleshooting.
We have these available for sale in our online store. Contact me for more information.
- TEM Cell (IFI Industries)
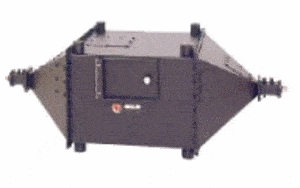
This thing is great for 2 things:
1. Emissions pre-compliance testing of small EUTs. It’s best when the EUT doesn’t have any cabling, but can still be useful if it does. The EUT size is restricted to about 15cm x 15cm for robust measurements. In Europe, emission and immunity testing of small EUTs without cabling is permissible (in some circumstances) in a TEM according to EN61000-4-20.
2. Immunity testing/troubleshooting. Instead of measuring the signal coming from the TEM, you can equally inject a signal into the TEM and generate a field in there. Because it’s so small, it doesn’t take a huge amount of power to get large field strengths in there. With a 75W low frequency amp, and a 20W, 30M-1GHz amplier, I can easily get over 30 V/m across the whole band.
We now offer a number of very cost effective TEM cells for sale in our online store.
- Current Probe (BCP-511 AH Systems)
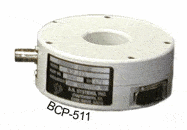
These guys, when coupled to a spectrum analyzer, can give you a very good picture of how well your cables will radiate. By measuring the common mode current on all of the cables, you can mathematically extrapolate to the far field electric field strength. So you can quite accurately predict what a test lab will measure. The downsides are that you’re only measuring what’s on the cables (which to be fair, is very often the culprit), and also it’s generally only useful for measurements up to a couple of hundred MHz. But, it’s cheap to do, and it covers a large range of emission issues that you may hit at a test lab, so it’s worth doing.
- Flicker & Harmonics Analyzer (TTI)
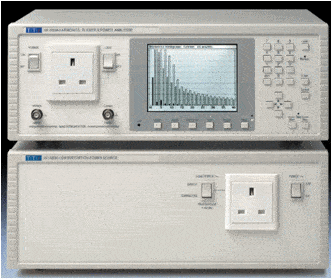
I still have this left over from my test lab and haven’t got around to selling it yet. It’s a low-cost flicker and harmonics analyzer that can be used for lot of equipment (up to 16A). Haven’t come across anyone that needs this sort of debugging yet, but it’s guaranteed if I sell it, someone will ask me to help them with a flicker failure!
- Line Impedance Stabilization Network (LISN) – EM-7823 (Electro-Metrics)
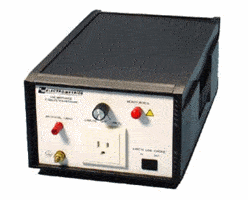
This piece of equipment is necessary for conducted emissions testing. It’s relatively cheap, and it’s quite easy to put together a test setup that conforms to the conducted emissions test standards. In North America, the measurements you make using this won’t be acceptable for the purposes of full compliance testing (your lab would need to be listed with the FCC and Industry Canada for that), but you could definitely put together a full compliance conducted emission setup for Europe and other some other regions.
There are many different configurations of LISNs and you should review the applicable standards for your product to pick the right one.
I’ve partnered with Tekbox to be able to offer you the industries most affordable LISNs. Check out the online store for more details.
- My OATS gear
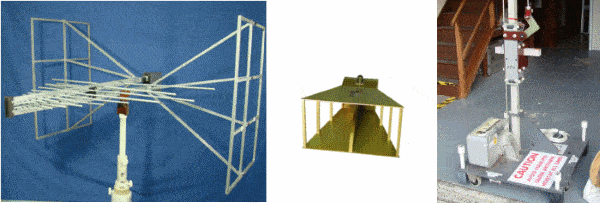
Again, some relics from my test lab, I still have a broadband bi-log, high frequency horn antenna, 4 meter automated mast, powered turntable, automation software etc. Although I haven’t used them in a while, I’m either going to sell them or use them for a full pre-compliance setup eventually. These are the key pieces of equipment, along with a spectrum analyzer, that are used to create an open area test site.
Immunity Testing Equipment
- Signal generators
For immunity testing, you usually want to be able to cover a large frequency range. For conducted immunity testing, that can mean as low as 150 kHz-80 MHz, while for radiated immunity testing requirements can be in the several GHz range. Signal generators are also very useful for verifying and calibrating spectrum analyzers and other test equipment. I currently have 3 signal generators:
1. HP 8657A

Low cost 100 kHz – 1 GHz signal generator. This is great for conducted immunity testing and other low frequency applications that I can’t think of right now. One downside is that it can ‘spike’ when sweeping frequencies which can cause abnormally high field strength values when coupled to an amplifier and transducer.
2. HP 8673E
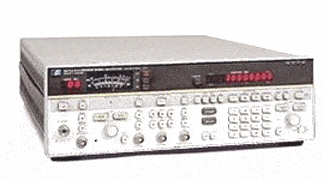
Of the same era of the 8566B spectrum analyzer, this thing is also a workhorse and bombproof. Amazingly accurate and it covers the frequency range 50 MHz – 18 GHz. Great for radiated immunity testing and also doing interference testing for wireless transmitters destined for Europe under the ETSI standards. It weighs more than 5 moons, so it isn’t great for portable test requirements.
3. Agilent E4433B
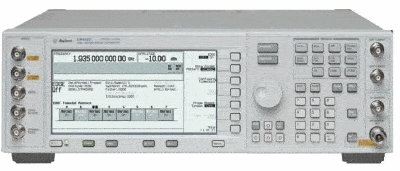
I bought this for one particular test job and haven’t been able to let it go since. Really accurate and covers a very useful frequency range (250 kHz – 4 GHz) for a lot of immunity tests and calibrating my analyzers. It also has a lot of different modulation modes.
- Bulk current Injection probe (Solar Electronics 9144-1N)
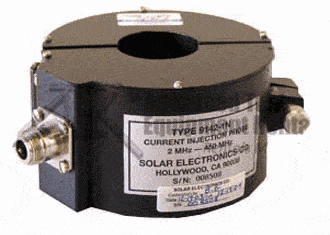
Injection probes are good for conducted immunity testing to 61000-4-6. It’s important to choose one with high gain across the frequency band that your standard calls out. This one is useful across the band 100kHz – 100MHz. You may need to go higher depending on your standard.
- Broadband power amplifiers
I use these amps for a number of immunity tests.
1. Amplifier Research 75A220

This powerful little amp is used for conducted immunity testing in conjunction with a bulk injection probe and a signal generator. Covering the 150 kHz to 220 MHz band at 75W, it’s useful for both conducted immunity testing as well as the lower end of the radiated immunity range (which I can do in the TEM cell).
2. Ophir GRF 5039
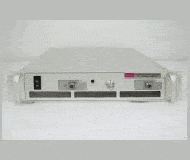
This amp covers the range 30MHz – 1GHz at 20W, so it’s useful for connecting to the TEM for radiated immunity tests. I can easily generate fields over 30 V/m at these powers.
- Isotropic field probe (FP2080 and FM2000)
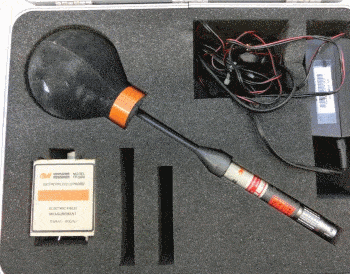
I use this to verify the radiated field strength value in the TEM cell. It covers the band 80 MHz – 40 GHz. I’ve also used it do to an EM survey at a large satellite transmitter base station for worker safety. They were working with powers of 2.2 kW conducted which translated to over 1 GW EIRP when the beam was formed on the 20 meter dish.
RF Equipment
For RF pre-compliance testing I use this setup:
1. Spectrum analyzer
Depending on what aspect of the RF I’m testing, I use a different analyzer. For in-band RF characterization I use the 8560A or FSH-3. For spurious measurements up to 22GHz, I use the 8566B.
2. Pre-amps
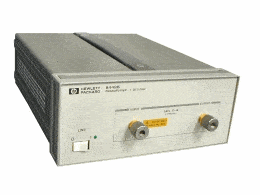
I have a few pre-amps to cover several bands. the main ones I use are the HP11975A covering the band 2.0 GHz – 8 GHz at +16 dBm gain. For higher frequency stuff, I use my HP 8449B 1GHz to 26.5GHz amp at +23.5dB gain. These are pricey bits of gear, but are usually only necessary for radiated measurements.
3. Power meter and probes (R&S NRVS)
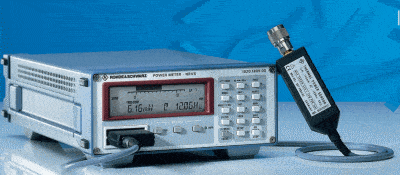
Some European ETSI standards need transmitter peak power measurements to be made with a power meter rather than a spectrum analyzer. Although this one isn’t fancy enough to do ‘gating’ of pulsed RF signals, it does the job for most transmitters. To cover a couple of different frequency ranges and power levels, I use the NRV-Z1 and NRV-Z5 probes. This covers a lot of transmitters.
4. Double ridge horn antenna (AH Systems SAS-571)
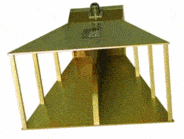
This thing is good for making radiated measurements from 2 GHz – 18 GHz. Coupled with a spectrum analyzer (and sometimes an RF amplifier), you can make good radiated field measurements at 1-3 meters in an office board room or loading bay.
5. Misc stuff
It’s also very useful to have on hand a sprinkling of attenuators at different power ratings, frequency ranges and connector styles. I have a large kit of connector adapters that covert to and from lots of different types like N, SMA, RP-SMA, BNC, male, female and more. Different cables are also very useful, and for the high frequency RF stuff, it’s better to get very high quality cabling to minimize attenuation and reflections.
Conclusion
Hopefully this has shed some light on ways that you can start to reduce testing costs and accelerate time to market. You also have an idea of what gear I keep in my kit now. So it looks like I just wrote 4000 words today and if you read this far then you know it’s time for a rum and coke.


Comments 25
The best of your blog post Andy!!! That IS gold!! 🙂
Thanks Vince 🙂
Any emissions software recommendations for radiated and conducted measurements?
Thank you for this nice article! I was wondering what ESD testequipment do you use/recommend?
The unit I have now is an obsolete simulator from 3M. There wasn’t even a part number on it and I haven’t been able to find a manual. I used to have an NSG435 which was very good, but I sold that. Just check out ebay and see what’s available. The most important thing to know is whether it works within specification or not. Also the discharge networks need to match the standard you’re using.
Great post Andy, hope to see more of these in the near future.
Enjoy the rum and coke 😉
Thanks Benno. What kind of topics are you interested in? I can always use suggestions for new blog posts.
Pingback: The EMC Pre-Compliance Testing Guide - EMC FastPass
guid me for best buy emc test equipments accordance requirements IEC 62040-2&61204
Best regards
Kaveh
Iran-tehran
+989123022540
Hey, that’s poewufrl. Thanks for the news.
Andy, It is awesome. thanks for sharing.
Author
No problem. Glad you found it useful.
Great blog Andy.
Very timely as I’m about to start a job where in need to consider some in house equipment to derisk EMC testing.
Thank you,
Chris
Author
You’re very welcome. Good luck Chris.
Andy,
Very informative blog..Gr8 job.
How can we insure the calibration of the in-house EMC test lab?
What is the industry standard for in-house EMC test lab calibration?
Can you pls help on the same.
Thanks and regards,
Sachin
Pingback: The EMC Pre-Compliance Testing Guide - EMC FastPass
Do you have any suggestion about Automotive EMC test?
I have been told by this company that an EMC was never completed. Could this be true as I thought the CE mark would require this, especially for their wifi transmitter.
Would be interested to hear your thoughts.
Thanks.
Dale
Thank you so much Andy, very useful post to us.
We are setting up EMI/EMC lab, this will become helpful to us in many aspects.
hope to see such useful post in coming future as well.
thanks again.
Author
No problem 🙂
Pingback: Essential EMC Design Rules To Avoid The 7 Most Common EMC Failures - EMC FastPass
Pingback: CE Mark Guide for Electronic Hardware Products - EMC FastPass
Thank you Andy. It is a lot of useful information for EMC testing. I am trying to make an inhouse testing for 1MHz to 2 Ghz. Can I use VNA instead of Spectrum analyzer?
Thank you Andy, very informative as usual.
Would you mind giving your opinion on the TinySA ultra, a 150€ SA? Could be a new budget option.
Author
Hi Alex, I don’t have any personal experience with that specific unit. I would recommend looking for Ken Wyatt’s articles reviewing and comparing various low-cost analyzers.